The road to nirvana |
|
My journey into Photography, Horology, and Audiophilia |

Wood carving a Gladiator with the Snapmaker A250
May 9, 2020
After the success of my first ever carving, I have another idea for the next project.
What you'll need
- 250 mm x 135 mm Pine wood
- Snapmaker 3.175 mm ball-end milling bit
- Snapmaker A250
- Fusion 360
- Snapmaker 2 post processor installed
- Snapmaker tools installed
What to carve?
First of all, while I am able to design many mechanical models, my skills in sculpting is zero. I could have created some random shapes in Fusion 360 and carve it but what's the fun in there?
I remembered I wanted to 3D print a gladiator before, it was from Thingiverse https://www.thingiverse.com/thing:4174522 and this is the perfect subject.
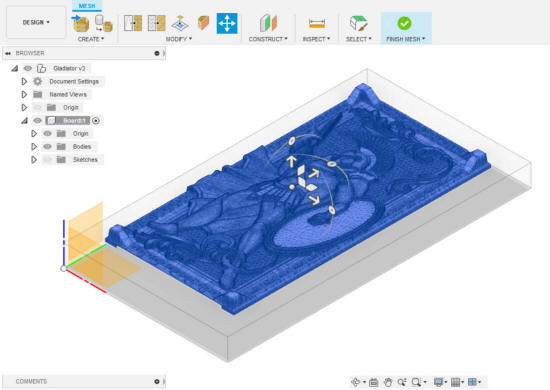
Inserting a 3D model (mesh/STL) in Fusion 360
Open Fusion 360 and in Design mode, create a new Component, I usually call it "Board". Create a new Sketch then using the 2-point Rectangle, create a sketch that is 250 x 135. You can use other dimensions of similar ratio to suit your needs.
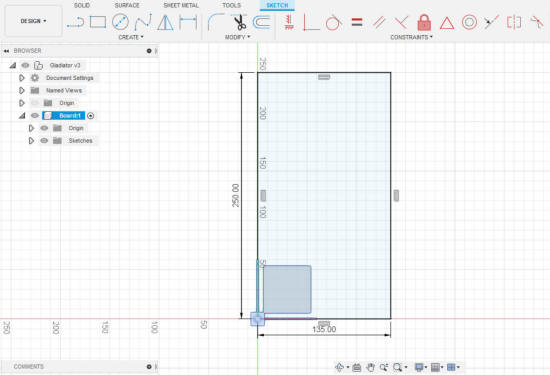
Take note of the proper orientation in the axis when creating the sketch. We'd like to be able to put the gladiator mesh (STL) on top.
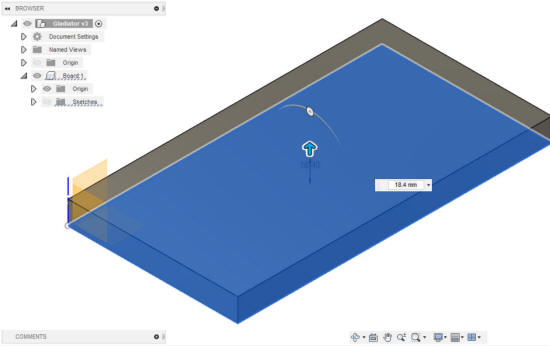
My pine boards are 18.4 mm thick, while it is not necessary to have the same thickness I extruded the sketch to create a 250 x 135 x 18.4 mm body.
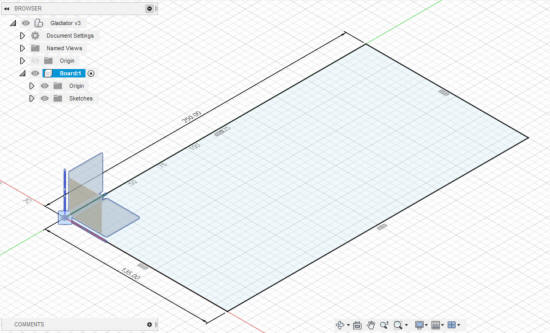
Now, I'll insert the gladiator mesh (STL) into the design using Insert Mesh. Upon insert, it will be larger and not positioned properly on the extruded body, so go to Edit Mesh, scale, and move the mesh until it's in the center of the board and resting on top of it.
Confirm the placement of the mesh by checking all the views
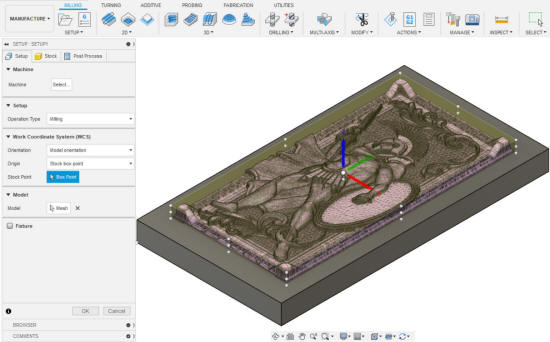
Creating the tool path in Fusion 360
Switch to Manufacture to setup the Milling. Create a new Setup, as shown. Here are the important points:
- Operation Type = Milling, which what we want to do.
- Origin = Stock Box Point, this will use the center as the origin and is my personal preference. If you want the origin elsewhere, make the change as appropriate. Make sure Z (blue arrow) is pointing up.
- Model = Mesh, to achieve this, click on the gladiator mesh which will configure this parameter to use the gladiator as the model. Now this is the key, it has to be "mesh" and not another option such as "body."
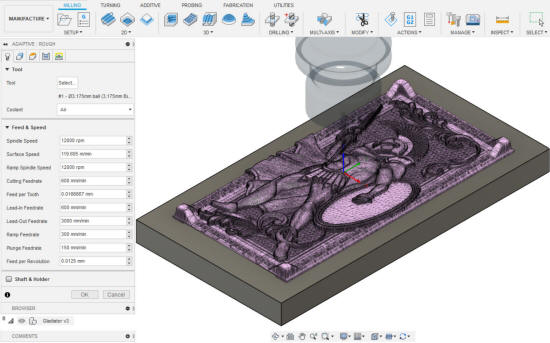
Under 3D, select Adaptive Clearing and set the Tool parameters as follows:
- Tool = Snapmaker 3.175 mm ball-end bit
- Coolant = Air (not that it matters)
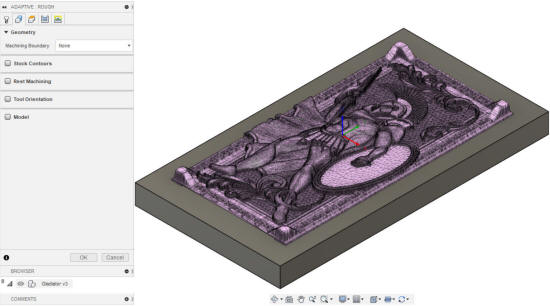
In the Geometry tab, the defaults are fine unless we wanted a finishing pass where we need to enable and setup Rest Machining.
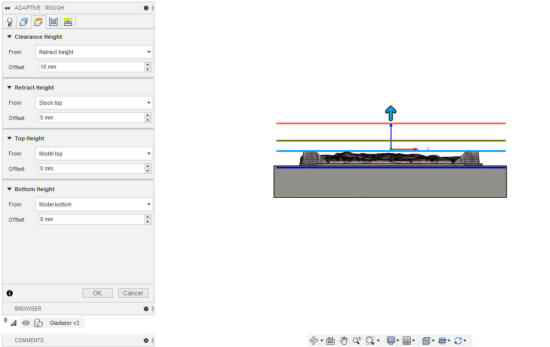
In the Heights tab, set:
- Top Height = Model Top
- Bottom Height = Model Bottom
Remember I talked about the importance of the "mesh" as the value in the Model parameter in the previous step? By doing that, the Top Height = Model Top = Mesh top. We have set the top height to the top of the mesh, our Gladiator.
Therefore, Bottom Height = Model Bottom = Mesh bottom and we have set the bottom height of our mesh.
You can confirm visually as in the following photo.
In the Passes tab, set:
- Stock to Leave = Uncheck
- Maximum Roughing Stepdown = 1 mm, do not use 1 mm unless the wood has hardness < 1000, according to Snapmaker. Since I'm using pine wood in which variants don't have > 1000 hardness, the 1 mm stepdown should be fine, otherwise it should be 0.5 mm which will take more time.

Finally, in the Linking tab, I'll set the Ramp / Ramp Type to Plunge.
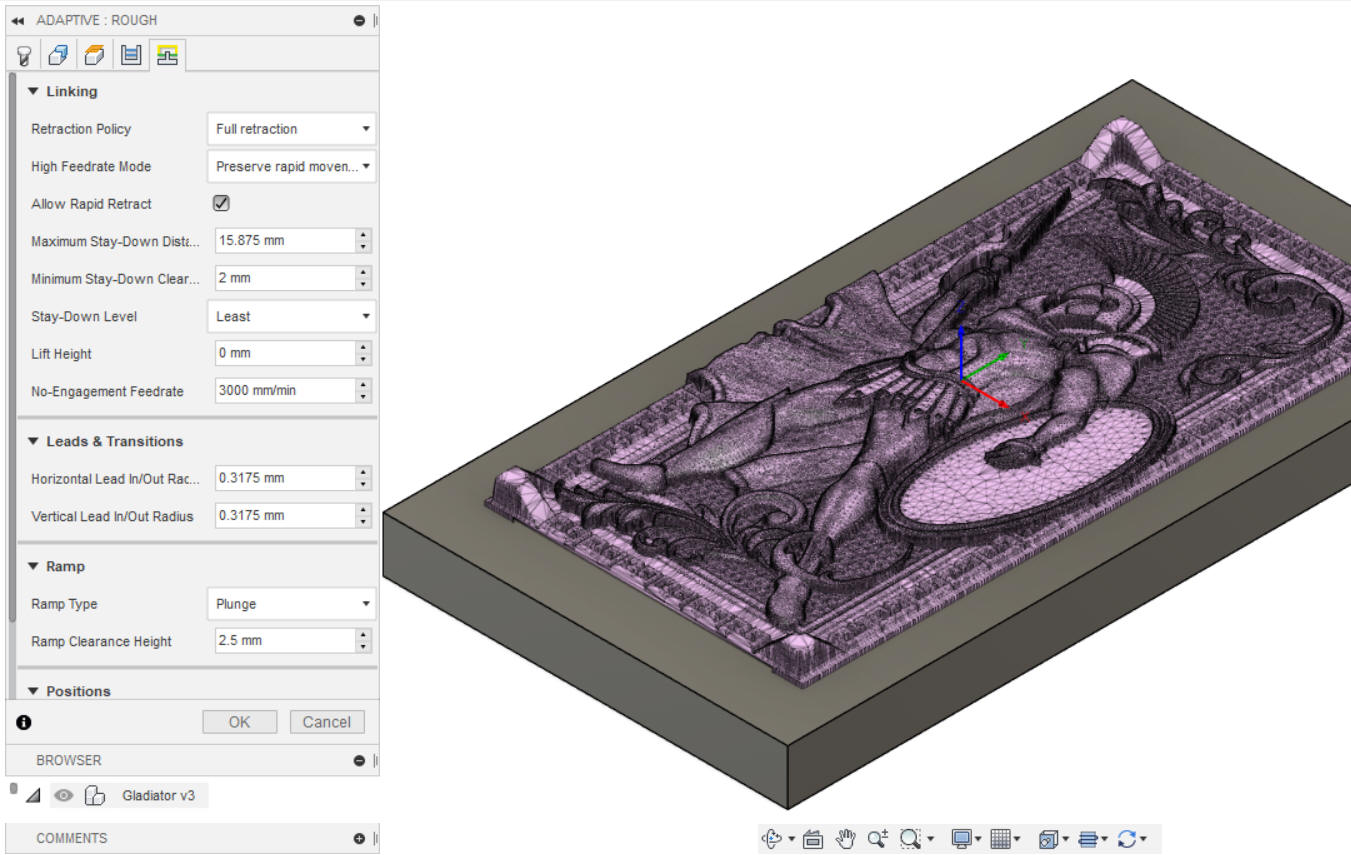
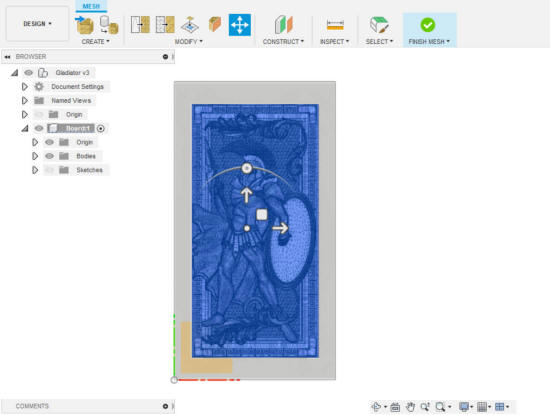
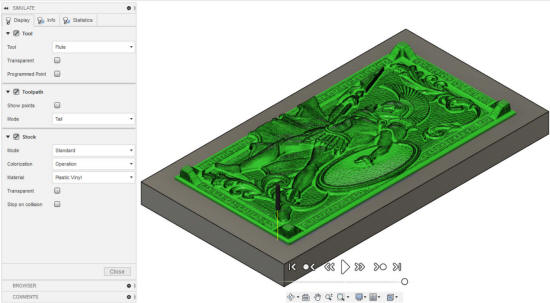
The simulation result looks good, with an estimated machining time of 7 hours 25 minutes.
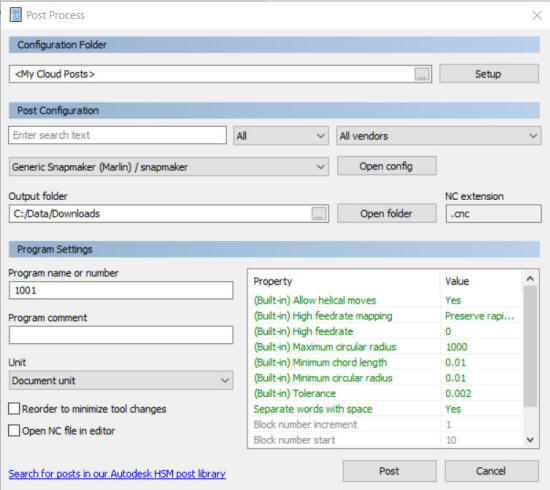
We are now ready to export the tool path. Right click Setup and select Post Process. Make sure that the Snapmaker post processor is selected. Set the output folder where you'd like to store the file and click Post.
Loading the tool path in Snapmaker Luban
Open Snapmaker Luban, make sure you're in the Workspace. Click Open G-code File and specify the file from the Fusion 360 output, which if you didn't change is 1001.cnc
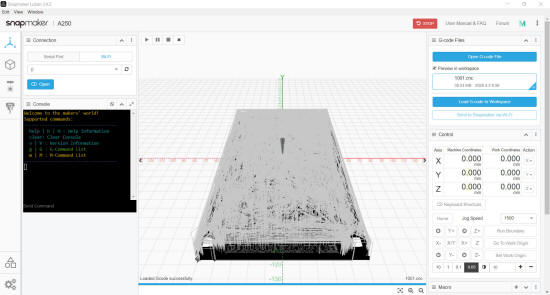
You can then send it over the the Snapmaker for untethered operation, or connect to the Snapmaker and hit the Play button for tethered operation.
Enjoy the wait.