The road to nirvana |
|
My journey into Photography, Horology, and Audiophilia |
Fixing the Cetus 2 clog
January 2, 2023
It was unfortunate for me that my first experience with the Cetus 2 was a clog in extruder 1 on the day of assembly which was last December 19, 2022. Extruder 2 is working as it should so I was "enjoying" the new Cetus 2 experience with just one extruder working. I have changed all my models to use Extruder 2 in UP Studio 3.
Today, I found inspiration to address the issue. While I have filed a support case with Tiertime and Jason Ng replied with the initial steps to look at, I will now proceed with the extruder disassembly.
Extruder disassembly
The first step is to remove the extruder cover where the two fans are screwed on but I removed both fans anyway because they're not screwed in properly and making unnecessary noise.
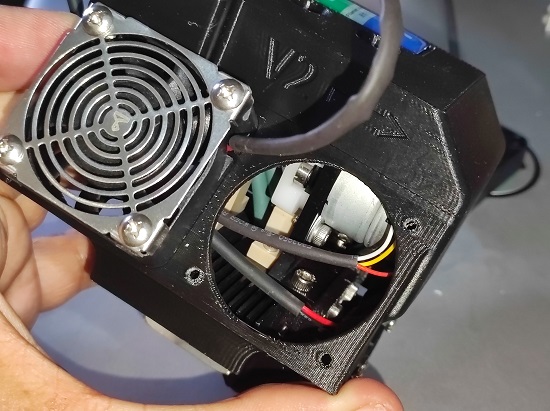
After removing the right fan, the filament pieces that caused the clog is now visible. The motor and filament intake is very similar to my Cetus Mk3 and is perfectly ok with since I know how it works. Although I had the Cetus Mk3 upgraded to metal from the plastic guide as seen here in white.
Disconnect all three cables using tweezers or appropriate tool, just don't pull by the wires. They're directional, so putting them back in later will be easy.
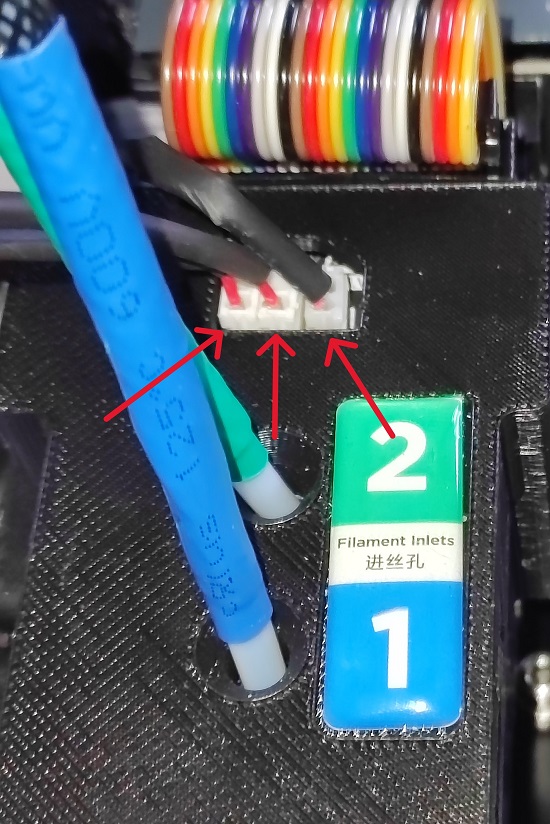
Once the cables are out, with the fan holes facing you, pull the extruder cover (black 3D printed material) to the right (as indicated by the arrow).
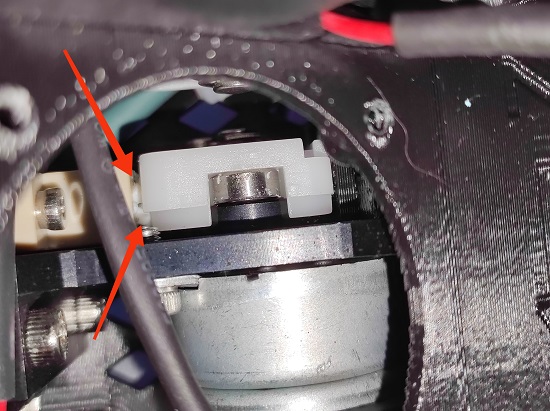
This is the view from the rear and it reveals that one of the retaining screw wasn't done properly (red arrow). Removing it will definitely shred the hex head.

I then removed the motor mount, there are four screws in pairs (see the blue arrows). Each pair use a different hex size, so be sure to use the proper one.
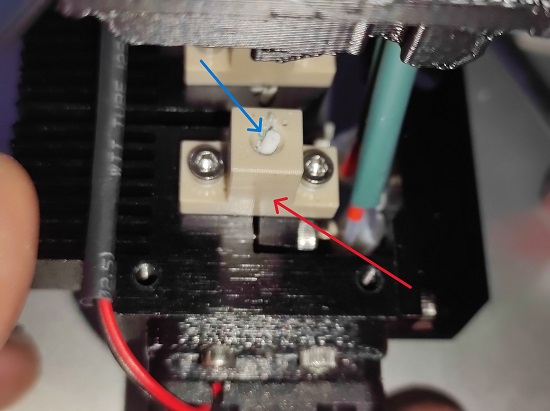
After removing the extruder 1 motor assembly, the broken filament is now revealed in its entirety (blue arrow). I pulled out the filament remains but I'm sure there's gunk down the path so I need to remove the bowden retainer (red arrow).
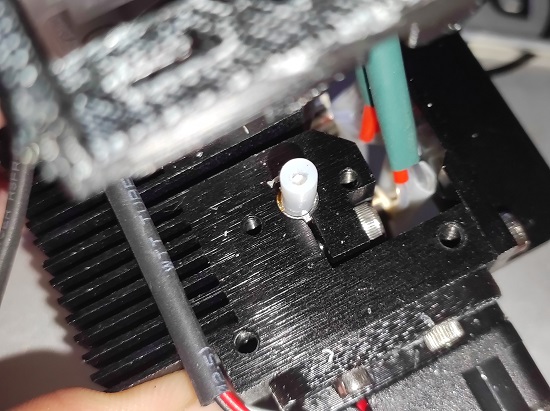
With the bowden tube clearly visible, carefully remove it without unnecessarily squeezing it. If you have an extra bowden tube and proper bowden cutter, cut one in the proper length and use it instead. However, I can't find my cutter so I will re-use this bowden piece.
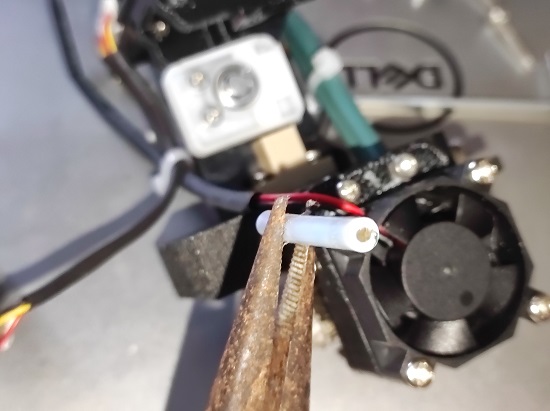
Here's the bowden piece that reveals more gunk filament inside it.
![]()
I used the included (but not shown tool in the quick start guide) bad-ass needle with circle end, I pushed off all the gunk inside the bowden tube.
Once the bowden tube has been cleaned, the following procedure will complete the assembly back.
- insert the bowden tube back
- take the retaining part and screw it back in (two screws)
- take the motor assembly and screw it back in (four screws)
- insert the extruder cover back (make sure you align the slots properly)
- screw the fans back (do not over tighten the screws, just make sure the fan covers are scure, and with the Tiertime logo up) if you removed them
- insert the fan cables back
- mount the extruder assembly back
- connect the extruder cable
That's it. I am finally enjoying two extruders of my Cetus 2.