The road to nirvana |
|
My journey into Photography, Horology, and Audiophilia |
Leveling the Cetus 2 3D printer
December 30, 2022
Leveling is a very basic but mandatory step in making successful prints. 3D printers have different ways of leveling, some manual, some automatic, but conceptually they're all the same. The Cetus 2 is no exception and easy to achieve due to automated leveling feature.
There are three steps to achieve a suitable leveling for that dimensionally accurate print.
- Platform Leveling
- Auto Leveling
- Model Calibration
The first two are accessible as options from the Level Calibration button, while Model Calibration has it's own button.
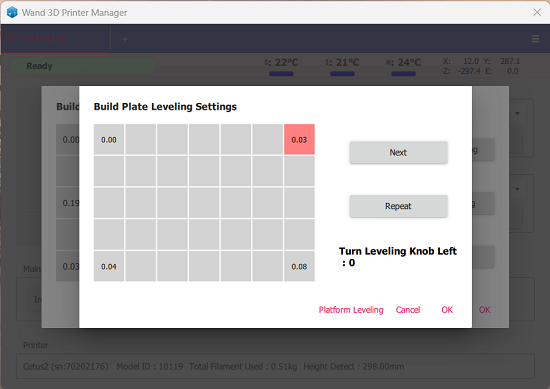
Platform Leveling
In this mode, I tried to make the four corners' offset as close to each other as possible. If the value is negative, turn the corner knob counter-clockwise, if positive, turn the knob clockwise. Run the Platform Leveling again, and continue adjusting until they're all close to zero.
Here's the result of my Platform Calibration:
Auto Levelling
With the Cetus 2 having a 200mm x 300mm build plate, the sensor area is a 4 x 3 matrix. To find out the baseline, run the Auto Calibration test and upon completion, review the results. I aimed for offset no more than 0.5 and that was my starting point. Turn the knobs at the corners to achieve "near-flat" result thru a repetitive process of running the Auto Calibration, adjusting the knobs, repeat. When I got tired, this is the reading of the matrix.
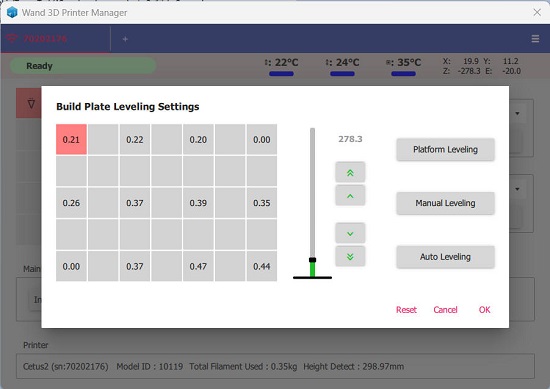
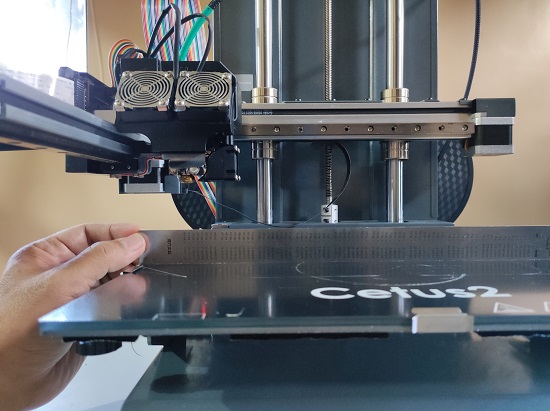
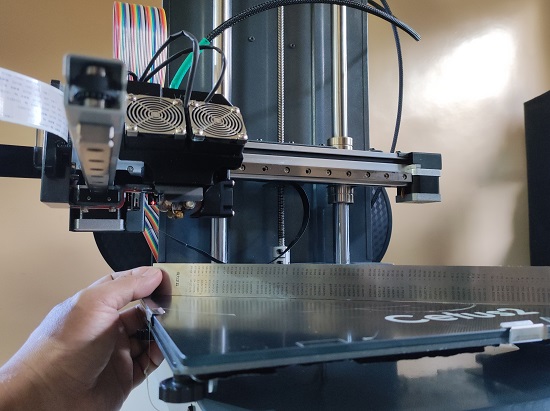
I still use the steel ruler method to visually inspect the gaps and with the current settings the gaps are minimal.
In summary, I did the following:
- Remove the glass from the bed by removing the clips.
- Use a steel ruler to see the gaps, then perform adjustments by turning the corner knobs to minimize the gaps.
- Install the glass plate and secure it using the clips. I used the clips for left, right, and front center only.
- Initialize the printer then run Level Calibration, note the values and their position for adjustment.
- Turn the knob on the appropriate corner to minimize the offset.
- Run the Level Calibration and note the results.
- Repeat step 5 and 6 until the offset is close to 0 as much as possible. I am happy with the offset to be < 0.5 on every point.
Model Calibration
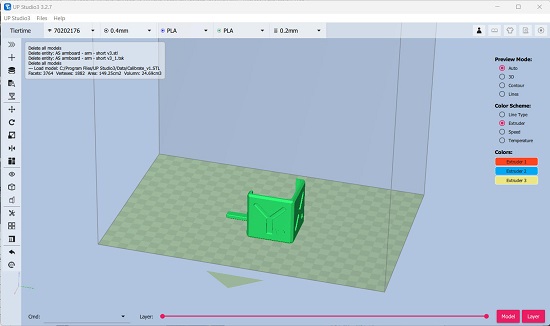
The last step is to calibrate the dimensional accuracy, which is done using Model Calibration. In UP Studio 3, select Files, Calibration Model. This will load the model which will be physically measured after printing.
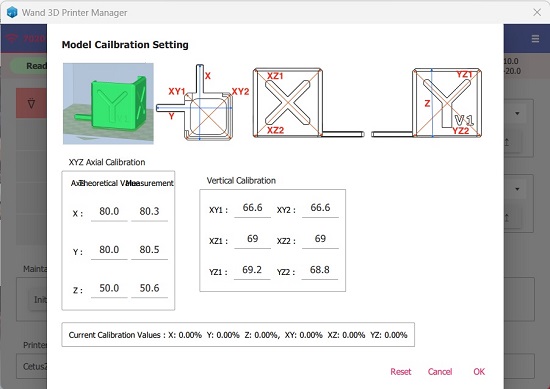
After printing, go to Wand then click Model Calibration.
- Enter the values in the appropriate text boxes as per physical measurement.
- Click OK only ONCE and wait until the Cetus2 absorbs the settings.
Print the Calibration Model again and you should get exact physical measurements for the X, Y, and Z values.