The road to nirvana |
|
My journey into Photography, Horology, and Audiophilia |

DIY Speakers
Bass reflex cabinet for the Cube Audio F8 Magus
July 19, 2023
While waiting for the Cube Audio F8 Magus to arrive, I decided to document how I built the bass reflex cabinet designed for it.
The trigger
There is a Facebook Marketplace listing for veneered marine ply and during the course of inquiry with the representative of Heavy Duty Depot in Taytay Rizal, she surprised me that they do cutting services. Using the superb Cutlist Evo online service, I generated a cutlist from the specifications found in the Cube Audio website and asked the representative to see if it's possible. To my delight, she came back swiftly and told me they can do it. I haven't experienced "it feels like heaven" feeling for a very long time until now as cutting a 4' x 8' plyboard is something I can't do.
I paid 5,500 for the 4' x 8' x 18mm veneered marine ply (Moon Oak), cutting service, and delivery fee. I can't contain my excitement that the entire process took just the next day including delivery.
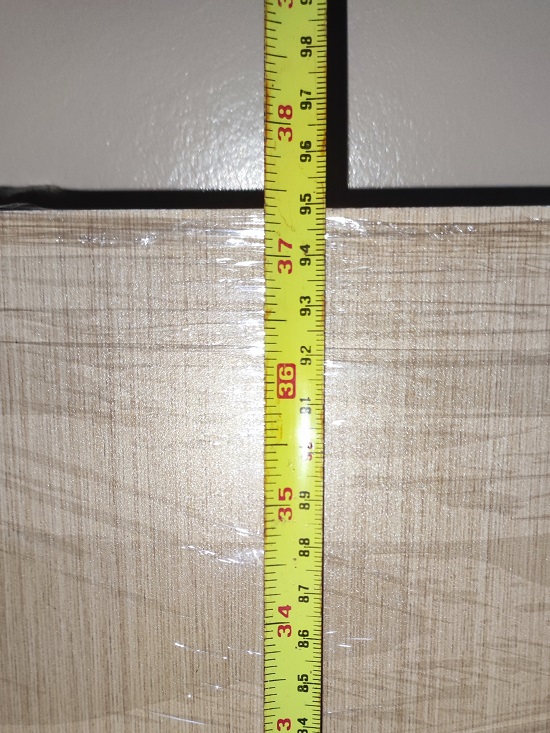
Happiness When the boards arrived, I immediately examined the quality of the cuts and they're satisfactory with no chipping on the edges of the veneer on both sides.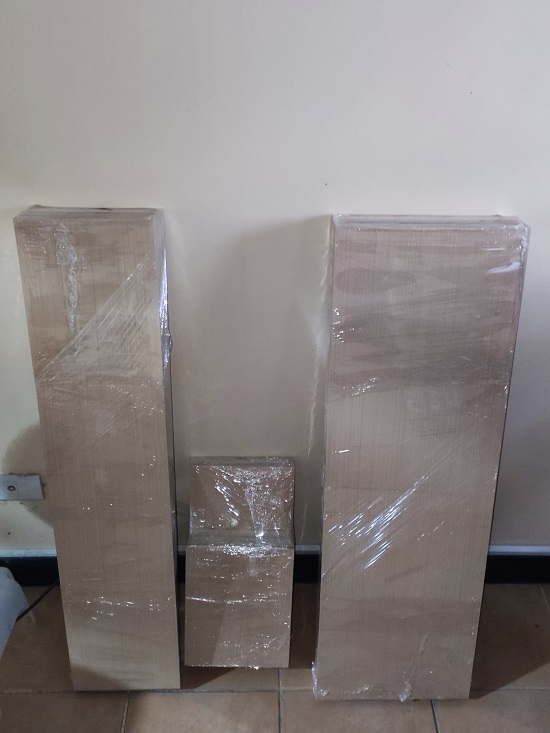 The dimensional accuracy as measured reveals a consistent -1mm
offset (perhaps due to the cutting method), i.e., 950mm turned out
949mm and that is fine with me.
The dimensional accuracy as measured reveals a consistent -1mm
offset (perhaps due to the cutting method), i.e., 950mm turned out
949mm and that is fine with me.
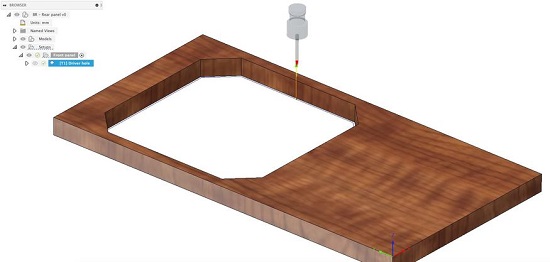
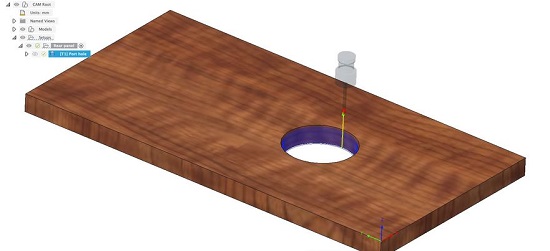
 Lack of tools
I don't have proper tools nor skills, to cut the holes for the
drivers and ports. In this instance, I'm leveraging on my basic
knowledge of Fusion 360 to create the milling GCODE for my Snapmaker
A250.
Lack of tools
I don't have proper tools nor skills, to cut the holes for the
drivers and ports. In this instance, I'm leveraging on my basic
knowledge of Fusion 360 to create the milling GCODE for my Snapmaker
A250.
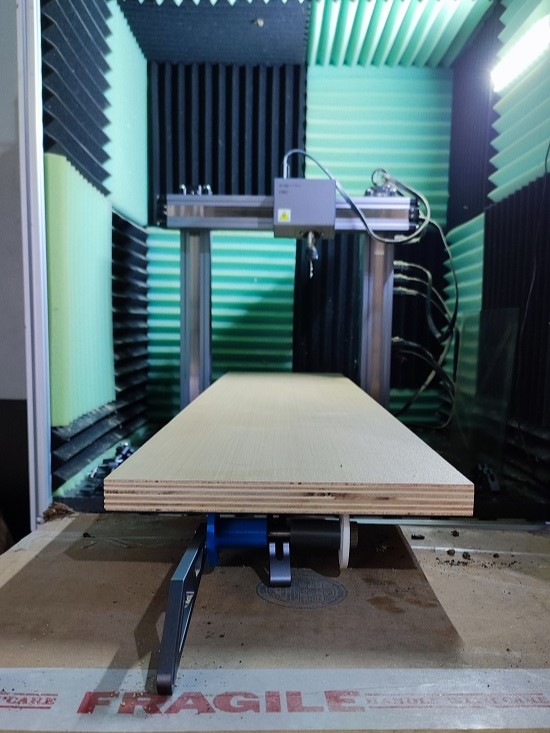
 Snapmaker A250 you say? Isn't that too small with a bed size of 235mm
x 250mm? Yes, but the dimensions of the cuts and the width of the
front and rear stock will fit the Snapmaker 250 bed. I created a
contraption out of my Black & Decker workbench to support the end of
the stock and minimize the stress on the bed.
Snapmaker A250 you say? Isn't that too small with a bed size of 235mm
x 250mm? Yes, but the dimensions of the cuts and the width of the
front and rear stock will fit the Snapmaker 250 bed. I created a
contraption out of my Black & Decker workbench to support the end of
the stock and minimize the stress on the bed.
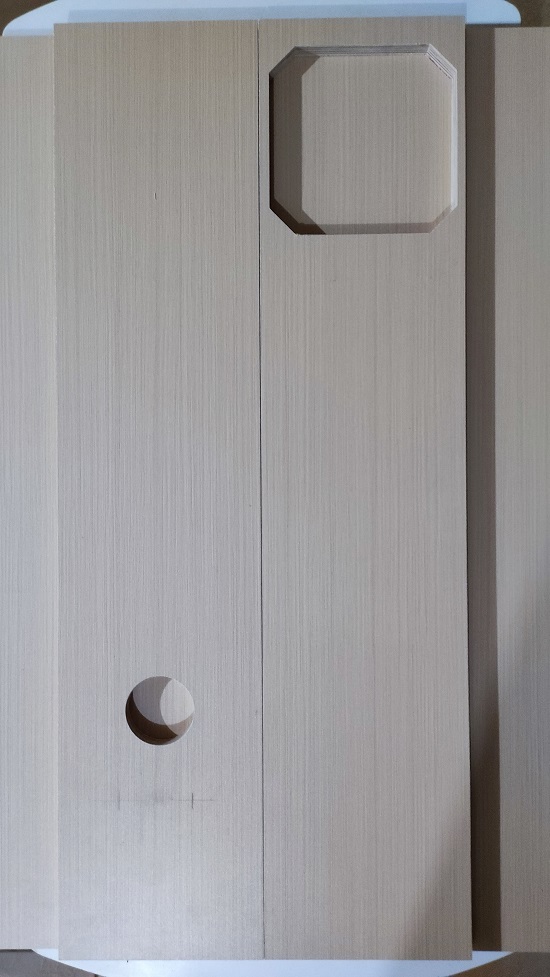
 The stock was secured on the bed using double adhesive tape. After a
few hours, I am pleased with the result of the milling on the front
and rear boards.
The stock was secured on the bed using double adhesive tape. After a
few hours, I am pleased with the result of the milling on the front
and rear boards.
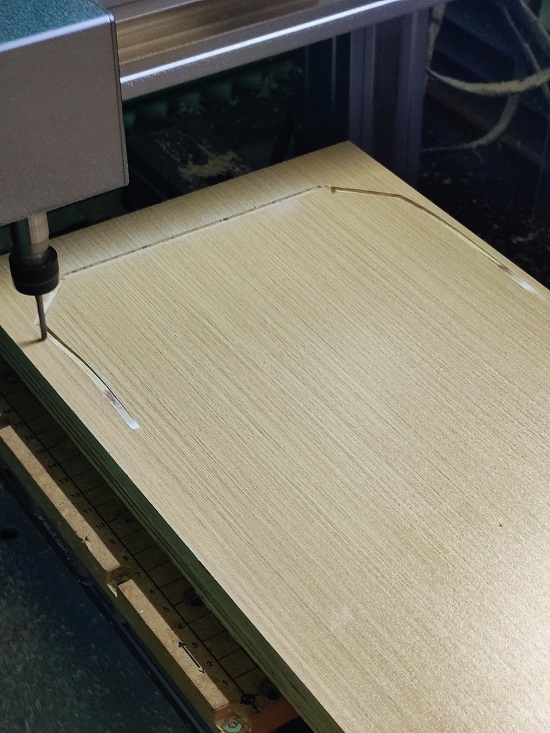
 The success I had was not replicated on the second set of stock as
the double adhesive tapes failed and caused a mishap during the
milling. Thankfully, I returned on time to check the job and stop
the operation.
The success I had was not replicated on the second set of stock as
the double adhesive tapes failed and caused a mishap during the
milling. Thankfully, I returned on time to check the job and stop
the operation.
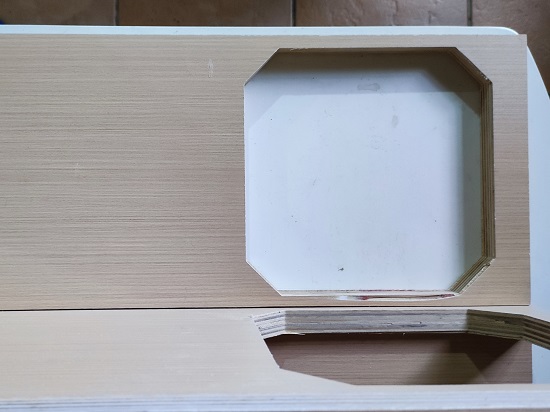
 To have a more secure bond between the bed and the stock, I applied
a layer of masking tape, then double adhesive tape, and "super glue"
on both the bed and stock contact surfaces. The enhanced adhesion
was more than enough for the jobs to complete without issues, which
allowed me to salvage the front panel.
To have a more secure bond between the bed and the stock, I applied
a layer of masking tape, then double adhesive tape, and "super glue"
on both the bed and stock contact surfaces. The enhanced adhesion
was more than enough for the jobs to complete without issues, which
allowed me to salvage the front panel.
 With the front panel and rear panel holes completed, it's now time
to do some glueing. The plan was to glue the back panel to the left
side panel first, followed by the front panel, then the top and
bottom. The right panel goes last so that I have room to attach the
acoustic foams.
With the front panel and rear panel holes completed, it's now time
to do some glueing. The plan was to glue the back panel to the left
side panel first, followed by the front panel, then the top and
bottom. The right panel goes last so that I have room to attach the
acoustic foams.
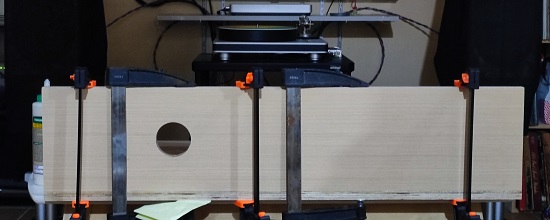 Thankfully, I was gifted a long table from a distant past that now
serves an important purpose. I made sure that the panels are
perfectly square before clamping.
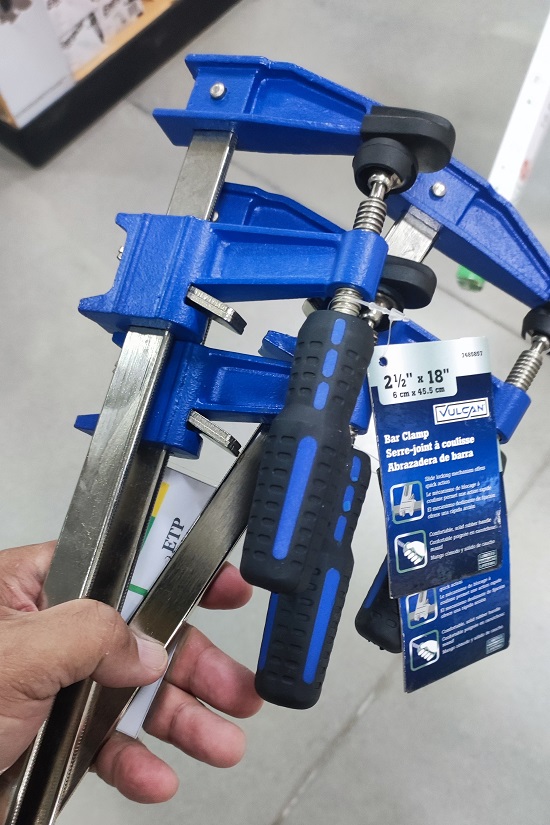
Those orange clamps failed one by one so before the 7-day return
period ends I had them exchanged to these instead.
Thankfully, I was gifted a long table from a distant past that now
serves an important purpose. I made sure that the panels are
perfectly square before clamping.
Those orange clamps failed one by one so before the 7-day return
period ends I had them exchanged to these instead.
 After 48 hours, I started cutting and test fitting the acoustic
foam. Based on the specifications, the acoustic foam is applied only
to the top and rear panels but I also intend to line up the side
panels with the polyester fiber.
After 48 hours, I started cutting and test fitting the acoustic
foam. Based on the specifications, the acoustic foam is applied only
to the top and rear panels but I also intend to line up the side
panels with the polyester fiber.
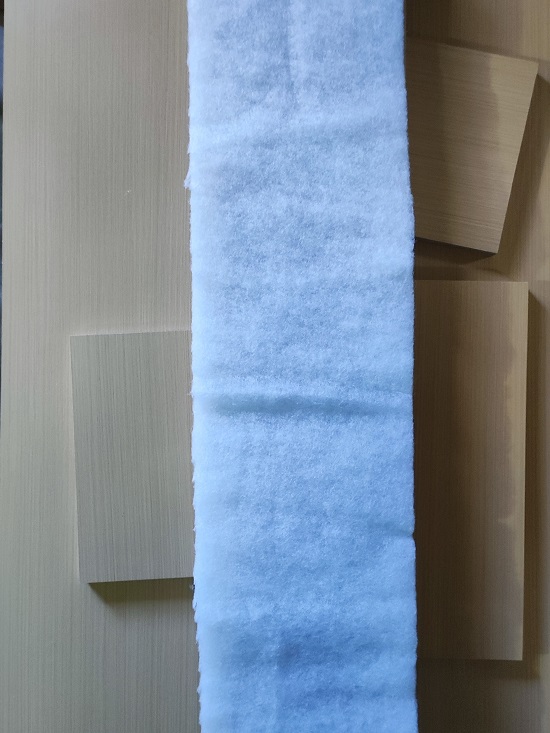
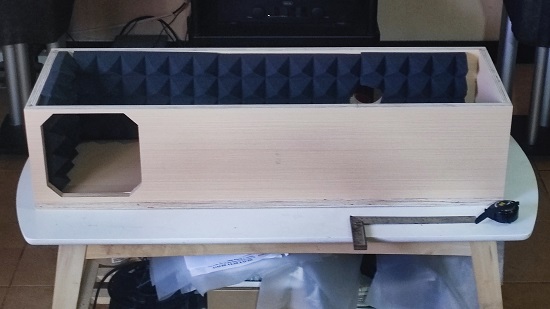 The acoustic foam is secured to the panels using double adhesive
tape and I'm confident on the strength of the adhesion. The
polyester fiber was lined up with masking tape first, then double
adhesive tape for a secure bond onto the side panels. In case the
measurements don't look good, I can easily remove the polyester fill
on the side panels.
The polyester fiber fill can be easily trimmed using a steel ruler
and sharp cutter.
The acoustic foam is secured to the panels using double adhesive
tape and I'm confident on the strength of the adhesion. The
polyester fiber was lined up with masking tape first, then double
adhesive tape for a secure bond onto the side panels. In case the
measurements don't look good, I can easily remove the polyester fill
on the side panels.
The polyester fiber fill can be easily trimmed using a steel ruler
and sharp cutter.
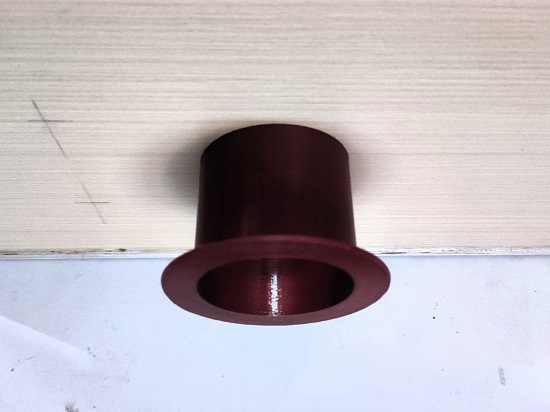
 The round file was used to enlarge the port hole just a little bit
for that perfect fit of the 3D-printed port tube.
The round file was used to enlarge the port hole just a little bit
for that perfect fit of the 3D-printed port tube.
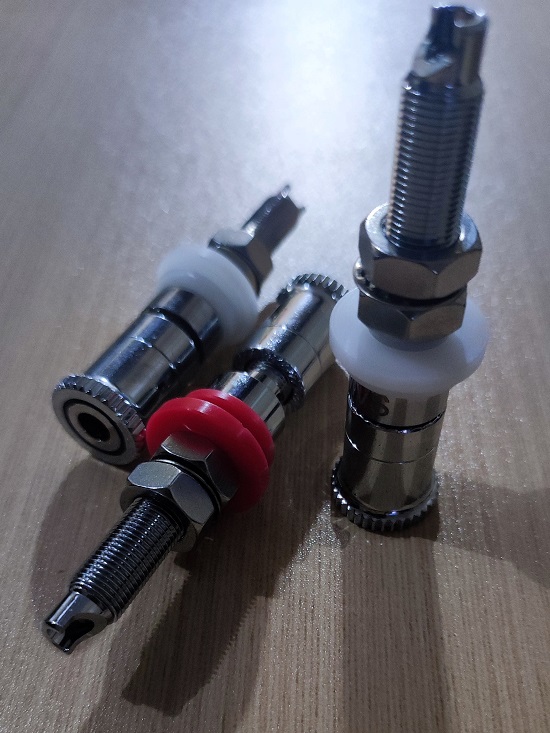
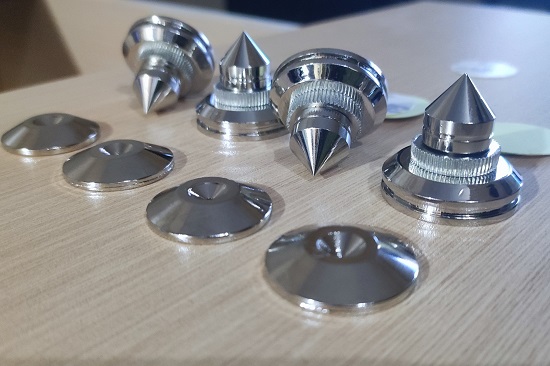
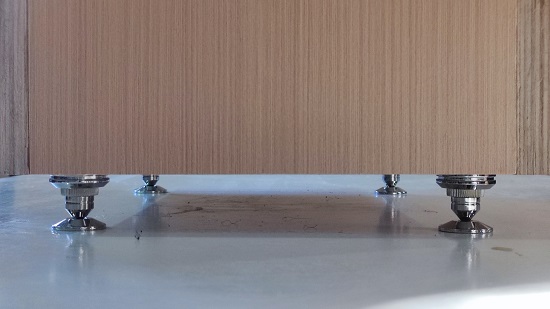
 I am pleased with the quality of the binding posts and adjustable
spiked feet. Instead of the suggested horizontally aligned binding
posts, I decided to make them vertically aligned just like my
Scansonic MB3.5B.
I am pleased with the quality of the binding posts and adjustable
spiked feet. Instead of the suggested horizontally aligned binding
posts, I decided to make them vertically aligned just like my
Scansonic MB3.5B.
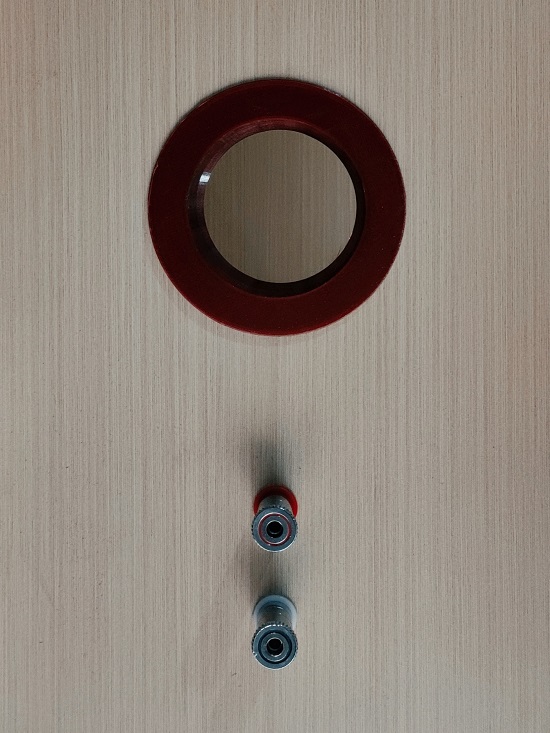 After the internal wires were screwed to the binding posts, it's
time to address the remaining part I am struggling with...
After the internal wires were screwed to the binding posts, it's
time to address the remaining part I am struggling with...
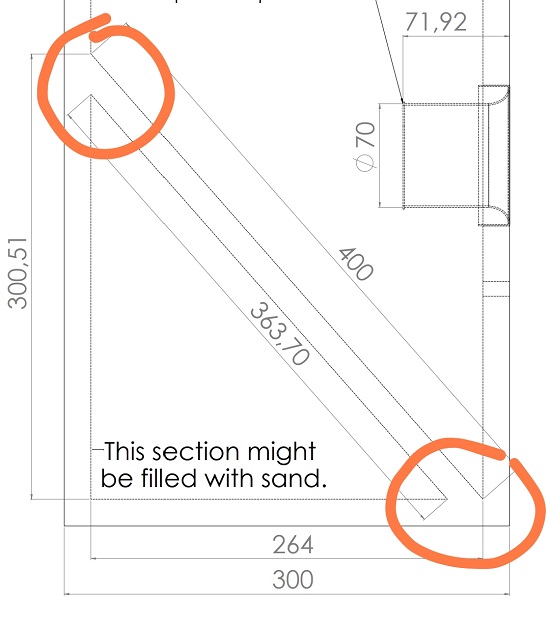 There was no angle specification so I had to physically mark this
piece for cutting. Initially, I thought of buying a cheap tabletop
table saw to accomplish the required edge angles. But they're not
simply 45° and while the angles can be derived and cut using a table
saw, I am not confident doing it. The next option is to use a
router, which since purchase I haven't even broken the seal. Make
the edge cut and file the stock like crazy to achive the required
angle. The last option is to use a jigsaw. However, I remember that
I never got a straight cut using it since I bought the tool. In the
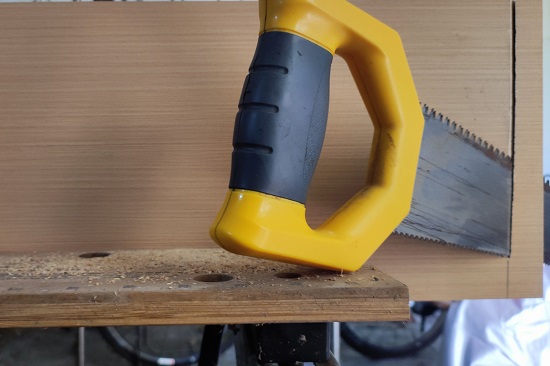
end, I told myself "screw it" and simply used the double edged saw
and I was surprised by the results! It was actually reasonably
straight!
There was no angle specification so I had to physically mark this
piece for cutting. Initially, I thought of buying a cheap tabletop
table saw to accomplish the required edge angles. But they're not
simply 45° and while the angles can be derived and cut using a table
saw, I am not confident doing it. The next option is to use a
router, which since purchase I haven't even broken the seal. Make
the edge cut and file the stock like crazy to achive the required
angle. The last option is to use a jigsaw. However, I remember that
I never got a straight cut using it since I bought the tool. In the
end, I told myself "screw it" and simply used the double edged saw
and I was surprised by the results! It was actually reasonably
straight!
 I still filed the edges to minimize the gaps against the front and
bottom panels. With both the pieces glued in place according to
specifications, it is time to fit and glue the side panels and let them cure for another
48 hours. Finally, the adjustable spiked feet were attached to the
bottom using the supplied round double adhesive tapes.
I still filed the edges to minimize the gaps against the front and
bottom panels. With both the pieces glued in place according to
specifications, it is time to fit and glue the side panels and let them cure for another
48 hours. Finally, the adjustable spiked feet were attached to the
bottom using the supplied round double adhesive tapes.
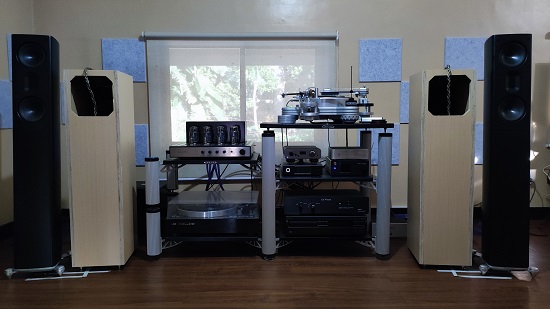
 So there, the cabinet has been completed and now I await the arrival
of the drivers from Poland. Here they are beside the Scansonic
MB3.5B.
So there, the cabinet has been completed and now I await the arrival
of the drivers from Poland. Here they are beside the Scansonic
MB3.5B.
 I applied a single coat of Odie's Oil using the applicator and
towels which made the laminated wood shinier, but that's about it. I
didn't expect some magic to happen because of the laminate but I'm
pleased nevertheless.
Sound check
So how does it sound? How does it measure compared to its big
brother F10 Neo and my other speakers?
On to the listening experience...
Materials used
Here's the list of materials to complete this project.
I applied a single coat of Odie's Oil using the applicator and
towels which made the laminated wood shinier, but that's about it. I
didn't expect some magic to happen because of the laminate but I'm
pleased nevertheless.
Sound check
So how does it sound? How does it measure compared to its big
brother F10 Neo and my other speakers?
On to the listening experience...
Materials used
Here's the list of materials to complete this project.- Cube Audio F8 Magus drivers
- 18mm marine ply
- Heavy duty binding posts
- Old IXOS 6006 Gamma Geometry speaker wires
- Adjustable spiked feet and plate
- 3D printed 70mm diameter port pipe
- Acoustic foam 5cm thickness
- Polyester fiber fill ½" thickness
- Titebond III wood glue
- Odie's Oil Starter Kit
- Tapes. Masking tape, double adhesive tape.
- Snapmaker 2 A250 3-in-1 modular system
- Cetus 3D Mk III 3D printer (discontinued)
- Various clamps
- Double edged saw for the angled edge cuts
- Round file, wide flat file
- Sanding blocks